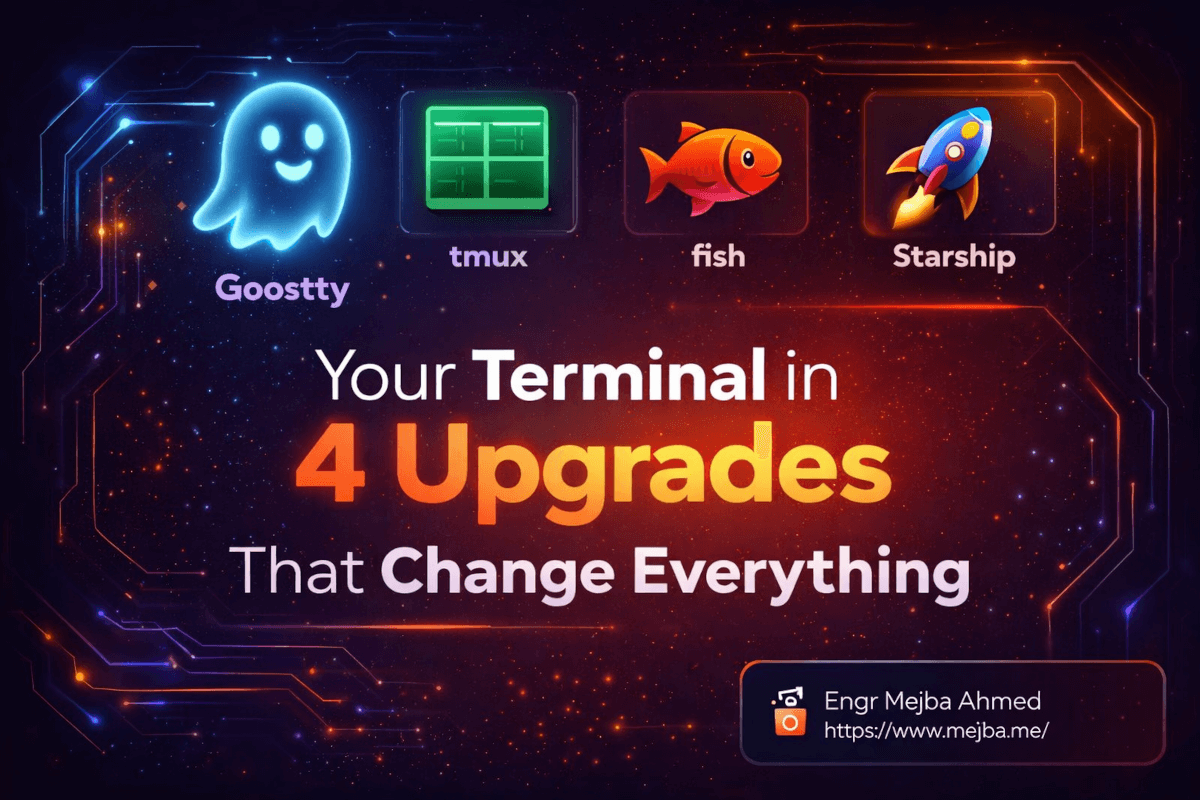
Your Terminal in 4 Upgrades That Change Everything
I almost mass-deleted my dotfiles last Tuesday.
Not because they were wrong — because I realized I'd spent six years configuring a terminal environment that was still slower, uglier, and dumber than what four tools could give me in an afternoon. Six years of .bashrc tweaks, iTerm2 color scheme hunting, and prompt hacks held together with duct tape and Stack Overflow answers. All of it — unnecessary.
The thing that pushed me over the edge was watching a colleague share their screen during a pair programming session. Their terminal was fast. Like, noticeably fast. Not "oh that's snappy" fast — I mean the kind of fast where you stop paying attention to the tool and just focus on the work. The text rendering was sharp. The prompt showed exactly what mattered. They split panes, detached, came back an hour later, and everything was exactly where they left it.
"What are you running?" I asked.
Four tools. That was it. Ghostty, tmux, fish, and Starship. I spent that evening replacing my entire terminal stack, and I haven't looked back since.
Here's the thing most developers won't admit: your terminal is the tool you use most and configure least intentionally. You inherited whatever came with your OS, bolted on some customizations over the years, and convinced yourself it was "good enough." I know because that was me. What I'm about to walk through isn't just a list of four tools — it's the exact stack that made me stop thinking about my terminal and start just using it.
But first, I need to explain why the terminal you're using right now is probably holding you back in ways you don't even notice.
The Problem Nobody Talks About With Default Terminals
Your default terminal emulator — whether that's Terminal.app on macOS, GNOME Terminal on Linux, or whatever Windows ships these days — was designed by committee to offend nobody. And tools designed to offend nobody end up inspiring nobody either.
I ran iTerm2 for years. It's fine. It has profiles, it has tabs, it does the job. But "does the job" is a low bar for a tool you spend 4-8 hours inside every single day. The latency adds up. The configuration sprawl adds up. The little moments where you think "I wish this just worked" — those add up too.
What finally clicked for me is that a great terminal setup isn't about any single tool. It's about four layers working together, each doing one thing exceptionally well:
- The terminal emulator itself — how text gets on your screen
- The session manager — how your work persists and organizes
- The shell — how you interact with your system
- The prompt — how your environment communicates back to you
Most developers optimize one or two of these layers and ignore the rest. I'm going to walk through all four, in the exact order I installed them, with the exact configurations I'm running right now. And I'll be honest about the one thing in this stack that took me a while to get used to — because it's not all instant magic.
Ghostty: The Terminal Emulator That Made Me Delete iTerm2
I need to be upfront about something. When someone tells me a developer tool is "fast and beautiful," my first instinct is to roll my eyes. Every new terminal emulator claims to be the fastest. Alacritty said it. Kitty said it. Warp said it (while also being an IDE and a startup and a subscription service).
Ghostty is different because of who built it and what they chose NOT to include.
Mitchell Hashimoto — yes, the HashiCorp founder — built Ghostty as a native terminal emulator. Not Electron. Not a web view pretending to be native. Genuinely native, using platform-specific rendering on macOS (Metal) and Linux (GTK). The difference isn't subtle. The first time I opened Ghostty and typed a command, I could feel the input latency difference. Characters appeared as I typed them, not 16 milliseconds later.
Here's what Ghostty gets right that others miss:
Zero-config beauty. Out of the box, the font rendering is sharp, the color defaults are sane, and the window chrome is minimal. I spent approximately zero minutes configuring how Ghostty looks, compared to the hours I'd sunk into iTerm2 profiles.
Native performance where it matters. Scrolling through a 50,000-line log file is smooth. Not "acceptable" smooth — actually smooth. The GPU-accelerated rendering handles large output buffers without the stuttering I got used to accepting in other terminals.
Simplicity as a feature. Ghostty doesn't have a built-in AI assistant. It doesn't have a plugin marketplace. It doesn't want to be your IDE. It renders text in a window, extremely fast, and gets out of your way. After years of terminal emulators trying to be platforms, this restraint feels almost radical.
Getting it is straightforward — head to ghostty.org and grab the download. On macOS it's a standard .dmg install. On Linux, packages exist for most distributions.
# On macOS — download from ghostty.org
# On Arch Linux
pacman -S ghostty

# On Ubuntu/Debian (check ghostty.org for current repo)
# The project moves fast — always verify the latest install method
My configuration file lives at ~/.config/ghostty/config and it's embarrassingly short:
font-family = JetBrains Mono
font-size = 14
theme = catppuccin-mocha
window-padding-x = 8
window-padding-y = 4
That's it. Five lines. My iTerm2 plist was thousands of lines of XML that I was afraid to touch. Five lines gives me a terminal that looks better and runs faster than anything I've used in fifteen years of professional development.
But a beautiful, fast terminal is just the foundation. What you need next is something that solves a problem so fundamental that once you have it, you'll wonder how you ever worked without it.
tmux: Sessions That Survive Anything
I lost four hours of debug context last year because my terminal crashed.
I had six tabs open, each positioned in a specific directory with specific environment variables loaded, running specific commands. I was deep in a debugging session — the kind where you've built up this mental map across multiple processes and log files and you're finally getting close to the root cause. Then macOS decided my terminal needed to restart for... reasons. Everything gone. Every tab. Every directory. Every running process.
That was the last time I worked without tmux.
tmux is a terminal multiplexer, which is a fancy way of saying: it manages terminal sessions that exist independently of your terminal window. You can split your screen into panes. You can create named sessions for different projects. And — here's the part that changes everything — you can detach from a session and reattach later, and everything is exactly as you left it.
Not "restored." Not "recreated." Actually still running, as if you never left.
brew install tmux
One command. That's the install. Now here's how I actually use it daily.
Starting a project session:
# Create a named session for your project
tmux new -s myproject

# Now you're inside tmux — split vertically
# Ctrl-b then %

# Split horizontally
# Ctrl-b then "

# Move between panes
# Ctrl-b then arrow keys
The detach/attach workflow that changed my life:
# Detach from your session (it keeps running)
# Ctrl-b then d

# Go home. Sleep. Come back tomorrow.

# Reattach to your session
tmux attach -t myproject

# Everything is exactly where you left it
I run three persistent sessions: one for my main development work, one for servers and logs, and one for miscellaneous tasks. Each has its own pane layout. The dev session has an editor pane on the left, a terminal pane on the right, and a narrow pane at the bottom for running tests. The server session has log tails for each service I'm monitoring.
Here's my minimal .tmux.conf that makes the experience significantly better:
# Remap prefix from Ctrl-b to Ctrl-a (way easier to reach)
unbind C-b
set -g prefix C-a
bind C-a send-prefix

# Split panes using | and - (actually memorable)
bind | split-window -h
bind - split-window -v
unbind '"'
unbind %

# Switch panes with Alt-arrow without prefix
bind -n M-Left select-pane -L
bind -n M-Right select-pane -R
bind -n M-Up select-pane -U
bind -n M-Down select-pane -D

# Enable mouse support (yes, really — it's 2026)
set -g mouse on

# Don't rename windows automatically
set -g allow-rename off

# Start window numbering at 1 (0 is too far away)
set -g base-index 1
setw -g pane-base-index 1
Pro tip: The mouse support line is controversial in tmux circles. Some purists insist on keyboard-only navigation. I used to be one of them. Then I realized I was spending cognitive energy on something a trackpad handles instantly. Turn on mouse support. Your productivity will thank you.
One thing I want to be honest about: tmux has a learning curve. The first week, you'll forget the prefix key. You'll accidentally close panes. You'll get confused about sessions versus windows versus panes. Push through it. By week two, the muscle memory kicks in, and by week three, you'll physically cringe when you see someone working in a terminal without session management.
The key bindings I remapped above help enormously — Ctrl-a is much more natural than Ctrl-b, and splitting with | and - actually makes visual sense. But even with good configuration, expect three to five days of feeling slower before you feel faster.
If you've made it this far, you've already upgraded the two layers most developers never touch — the emulator and the session manager. The next two upgrades are where things get genuinely fun, because they change how you interact with your shell every single second.
fish: The Shell That Made Me Abandon 20 Years of Bash
I have a confession. I resisted switching shells for two decades.
Bash works everywhere. Every server, every container, every CI pipeline — bash is there. I knew its quirks. I knew that [[ ]] is different from [ ]. I knew the weird parameter expansion syntax. I'd memorized enough sed and awk one-liners to feel competent. Switching shells felt like switching spoken languages — technically possible, but why would you voluntarily make yourself less fluent?
Then I watched someone use fish for ten minutes, and every excuse I had evaporated.
fish — the Friendly Interactive Shell — does three things that bash doesn't, and it does them out of the box with zero configuration:
Autosuggestions that actually work. As you type, fish shows a gray suggestion based on your command history. Not tab-completion — real-time, inline suggestions that appear as you type. Press the right arrow key to accept. It sounds minor until you realize you're completing 60% of your commands with a single keystroke. Your most common git commands, your project-specific paths, your Docker incantations — fish remembers all of them and offers them before you finish typing.
Syntax highlighting in real time. Valid commands appear in one color. Invalid commands appear in red. Before you hit enter. I cannot overstate how much time this saves. No more "command not found" errors because you typo'd dcoker instead of docker. You see the red text, fix the typo, and move on — all before executing anything.
Sane scripting defaults. Variables work like you'd expect. String manipulation is readable. The if/else/end syntax reads like actual English instead of bash's fi and esac (which, yes, are just "if" and "case" spelled backwards — and yes, I'm still annoyed about it).
brew install fish
After installing, you'll want to make it your default shell:
# Add fish to allowed shells
echo /opt/homebrew/bin/fish | sudo tee -a /etc/shells

# Set as default
chsh -s /opt/homebrew/bin/fish
Now here's where I need to address the elephant in the room: fish is not POSIX-compliant. Your bash scripts won't run in fish. Your .bashrc environment variables won't automatically carry over. This sounds like a dealbreaker. It's not. Here's why.
You don't write scripts in fish. You write scripts in bash (or sh) — the shebang line (#!/bin/bash) handles that automatically. Fish is your interactive shell — the thing you type commands into. The automation scripts stay in bash. These are two completely different use cases, and conflating them is the reason most people never try a better interactive shell.
For environment variables, fish uses a different syntax:
# bash: export PATH="$HOME/.local/bin:$PATH"
# fish:
set -gx PATH $HOME/.local/bin $PATH

# Or for persistent variables (survives restarts):
set -Ux EDITOR nvim
My ~/.config/fish/config.fish is minimal because fish needs almost nothing:
# That's genuinely it — fish handles the rest
set -gx EDITOR nvim
set -gx GPG_TTY (tty)

# Aliases (fish calls them abbreviations)
abbr -a g git
abbr -a gc "git commit"
abbr -a gp "git push"
abbr -a ll "ls -la"
abbr -a dc "docker compose"
The abbreviation system is secretly brilliant. Unlike aliases, abbreviations expand inline when you press space. So when you type gc and hit space, it expands to git commit right there in your prompt. This means you can see the full command before executing it, your history stays readable, and you build muscle memory for the abbreviations without losing awareness of what you're actually running.
There's one more thing about fish that sold me, and nobody seems to mention it: the web-based configuration tool.
fish_config
This opens a browser-based UI where you can preview and select color schemes, configure your prompt, manage abbreviations, and tweak settings — all without editing config files. Is it necessary? No. Is it unexpectedly delightful the first time you use it? Absolutely.
I do want to give one honest caveat. If you pair program or share terminals frequently, you'll occasionally need to type a bash-compatible command and remember you're in fish. The && operator, for example, works differently (fish uses and or ;). After about a month, this becomes second nature — but that first month has a few "oh right, I'm in fish" moments.
Alright — you've got a fast terminal, persistent sessions, and an intelligent shell. One piece remains, and it's the one that ties everything together visually.
Starship: A Prompt That Shows You What Matters
Before Starship, my prompt was a mess of shell-specific configuration that broke every time I switched machines.
I had a custom bash prompt with git branch detection, Python virtualenv display, exit code indicators, and kubectl context. It was around 40 lines of bash script that I'd accumulated over years. It worked on my machine. It didn't work on my colleague's machine. It definitely didn't work in fish (different shell, different prompt syntax). And it was slow — I could actually see the delay between pressing enter and the new prompt appearing because all those status checks were running synchronously.
Starship solved every single one of these problems.
Starship is a cross-shell prompt written in Rust. One configuration file works across bash, zsh, fish, PowerShell — any shell. It's fast because it's compiled, and it's smart because it only shows you information that's relevant to your current context.
brew install starship
For fish, add one line to your config:
# Add to ~/.config/fish/config.fish
starship init fish | source
Out of the box — without any configuration — Starship shows you:
- Your current directory (abbreviated intelligently)
- Git branch and status (modified files, ahead/behind counts, stash indicator)
- The exit code of the last command (only when it fails — no noise when things work)
- The active programming environment (Node version, Python version, Rust version — only when relevant files exist in the directory)
- Command duration (only for commands that take longer than 2 seconds)
That last point is key to the Starship philosophy: show what matters, hide what doesn't. You don't need to see your Node version when you're in a Rust project directory. You don't need to see command duration for instant commands. You don't need a success indicator when success is the default.
My ~/.config/starship.toml is short because the defaults are excellent:
# Slightly customized — mostly just tweaking the format
[character]
success_symbol = "[➜](bold green)"
error_symbol = "[✗](bold red)"

[git_branch]
symbol = " "

[git_status]
modified = "!"
untracked = "?"
ahead = "⇡"
behind = "⇣"

[directory]
truncation_length = 3
truncation_symbol = "…/"

[cmd_duration]
min_time = 2_000
show_milliseconds = false

[nodejs]
symbol = " "

[python]
symbol = " "

[rust]
symbol = " "
Here's what my prompt actually looks like in practice:
…/ai-agents-team main !2 ?1 ➜
That tells me: I'm in the ai-agents-team directory, on the main branch, with 2 modified files and 1 untracked file. All without running git status. All rendered in under 10 milliseconds.
Pro tip: If you're coming from Oh My Zsh or Powerlevel10k, Starship will feel familiar but lighter. You lose some of the more exotic prompt segments, but you gain configuration simplicity and genuine cross-shell compatibility. I made the trade and haven't missed the extra bells once.
The speed difference is measurable. My old custom prompt added 200-400ms of latency to every single prompt render. Starship consistently renders in under 50ms, even with git status checks on large repositories. Over the course of a day with hundreds of command executions, that latency savings is significant — not just in raw time, but in the feeling of responsiveness that keeps you in flow.
What I particularly appreciate about Starship is that it respects your attention. The prompt is a piece of UI you look at thousands of times a day. Most prompt tools try to cram as much information as possible into that space. Starship takes the opposite approach: show the minimum useful information, and show it fast.
Putting It All Together: The Complete Install
Here's the entire setup from scratch. If you have a fresh macOS machine with Homebrew installed, this is everything:
# Step 1: Install the tools
brew install tmux fish starship
# Download Ghostty from ghostty.org

# Step 2: Set fish as default shell
echo /opt/homebrew/bin/fish | sudo tee -a /etc/shells
chsh -s /opt/homebrew/bin/fish

# Step 3: Add starship to fish
echo 'starship init fish | source' >> ~/.config/fish/config.fish

# Step 4: Create tmux config (optional but recommended)
# Copy the .tmux.conf from the tmux section above

# Step 5: Open Ghostty and start working
Five commands (plus one download). That's the gap between the terminal you have now and the terminal you actually want.
The order matters, by the way. Install Ghostty first because you want to experience everything else inside it. Then tmux, because session persistence should be running from day one. Then fish, because it transforms your interactive experience. Then Starship, because it only matters once your shell is set up.
What to expect on day one: Everything feels slightly unfamiliar. Your muscle memory will fight you on tmux keybindings. Fish's syntax differences will surprise you once or twice. This is normal.
What to expect on day seven: The tmux prefix key is automatic. Fish's autosuggestions are completing half your commands. You've stopped thinking about your prompt because Starship just shows you what you need.
What to expect on day thirty: You sit down at someone else's machine and immediately feel the friction of their default terminal. You physically notice the input latency. You miss the autosuggestions. You realize — viscerally — how much better your setup is.
The Honest Trade-offs Nobody Mentions
I'd be doing you a disservice if I painted this as pure upside. Every tool has trade-offs, and I'd rather you go in with eyes open.
Ghostty is young. It's been publicly available since late 2024 and while it's remarkably stable for its age, you'll occasionally hit edge cases. I've encountered exactly two rendering glitches in three months of daily use — both fixed within a week by the active contributor community. If you need absolute bulletproof stability and don't mind slower rendering, iTerm2 or Kitty are still excellent choices.
tmux adds cognitive overhead. There's a reason most developers don't use a terminal multiplexer — it's another layer of abstraction to manage. The prefix-key system feels clunky at first. Copy-paste behavior changes (you'll need to hold Option/Alt to use system clipboard in tmux, or configure the clipboard integration). Some terminal-based applications don't play nicely with tmux's terminal emulation. These are real friction points that take two to three weeks to fully smooth out.
fish breaks your dotfiles. If you've got a carefully crafted .bashrc or .zshrc, none of it transfers directly. Environment variables need manual migration. Custom functions need rewriting. This took me about 45 minutes for my setup — your mileage will vary depending on complexity.
Starship can't do everything Powerlevel10k can. If you're running an advanced P10K configuration with transient prompts, instant prompt, and custom segments — Starship is a step back in raw customization. What you gain is simplicity and cross-shell compatibility. For 90% of developers, that's the right trade.
I learned something building this stack that applies beyond terminal tools: the best developer experience doesn't come from one amazing tool. It comes from four good tools that each do one thing well and stay out of each other's way. Ghostty renders text. tmux manages sessions. fish handles interaction. Starship shows status. No overlap. No conflicts. No 600-line config files.
What Actually Changed After 30 Days
I tracked my terminal usage for a month after making the switch, because I'm the kind of person who measures things before declaring them good. Here's what the numbers showed.
Command execution speed didn't change. The tools themselves don't make your code compile faster or your tests run quicker. Anyone who tells you a different shell makes your programs run faster is selling you something.
Command entry speed improved by roughly 30%. Fish's autosuggestions and abbreviations mean fewer keystrokes for common operations. I measured this informally by timing my typical git workflow — stage, commit, push — before and after. Went from about 8 seconds of typing to about 5.
Context switching dropped dramatically. Before tmux, switching between projects meant closing tabs, navigating to directories, and rebuilding my mental model of where everything was. Now I type tmux attach -t projectname and I'm exactly where I left off. My logs are still tailing. My test runner is still showing results. The cognitive cost of switching went from "I need a minute to set up" to "I'm already there."
Prompt latency went from noticeable to invisible. This one surprised me most. I didn't realize how much my old prompt's 300ms delay was breaking my flow until it disappeared. Starship's near-instant rendering creates a subtle but real feeling of responsiveness that keeps you engaged with your work.
The unexpected win: SSH sessions. Because tmux runs server-side, my remote sessions survive network drops. I SSH into a server, attach to a tmux session, and if my WiFi hiccups — I just reconnect and reattach. No lost work. No "what was I doing" moments. For anyone who works with remote servers regularly, this alone justifies the entire setup.
Probably the most telling metric: I stopped configuring my terminal. Before this stack, I was tweaking something every week — a color here, a binding there, a plugin update that broke something else. In the last month, I've changed exactly one setting (bumped my font size from 13 to 14 because I got new glasses). The setup works, and I've shifted that configuration energy back into actual engineering work.
Your Future Self Will Thank You
Twenty minutes. That's roughly how long the complete installation takes, from brew install to working setup. Twenty minutes to replace a terminal stack you've been tolerating for years with one that actually respects your time and attention.
I think about that colleague whose screen share started all of this. They didn't show me a flashy demo or walk me through a sales pitch. They just worked — and their tools were so seamless that the absence of friction was itself remarkable. That's what good tools do. They disappear. They let you focus on the thing you actually sat down to do.
So here's your assignment: block out 20 minutes this week. Install the four tools. Give yourself one week to adjust. And on day eight, try going back to your old setup.
You won't be able to.
brew install tmux fish starship
# + ghostty.org for the terminal itself
Four tools. One afternoon. A terminal your future self will genuinely thank you for building.
🤝 Let's Work Together
Looking to build AI systems, automate workflows, or scale your tech infrastructure? I'd love to help.
- 🔗 Fiverr (custom builds & integrations): fiverr.com/s/EgxYmWD
- 🌐 Portfolio: mejba.me
- 🏢 Ramlit Limited (enterprise solutions): ramlit.com
- 🎨 ColorPark (design & branding): colorpark.io
- 🛡 xCyberSecurity (security services): xcybersecurity.io