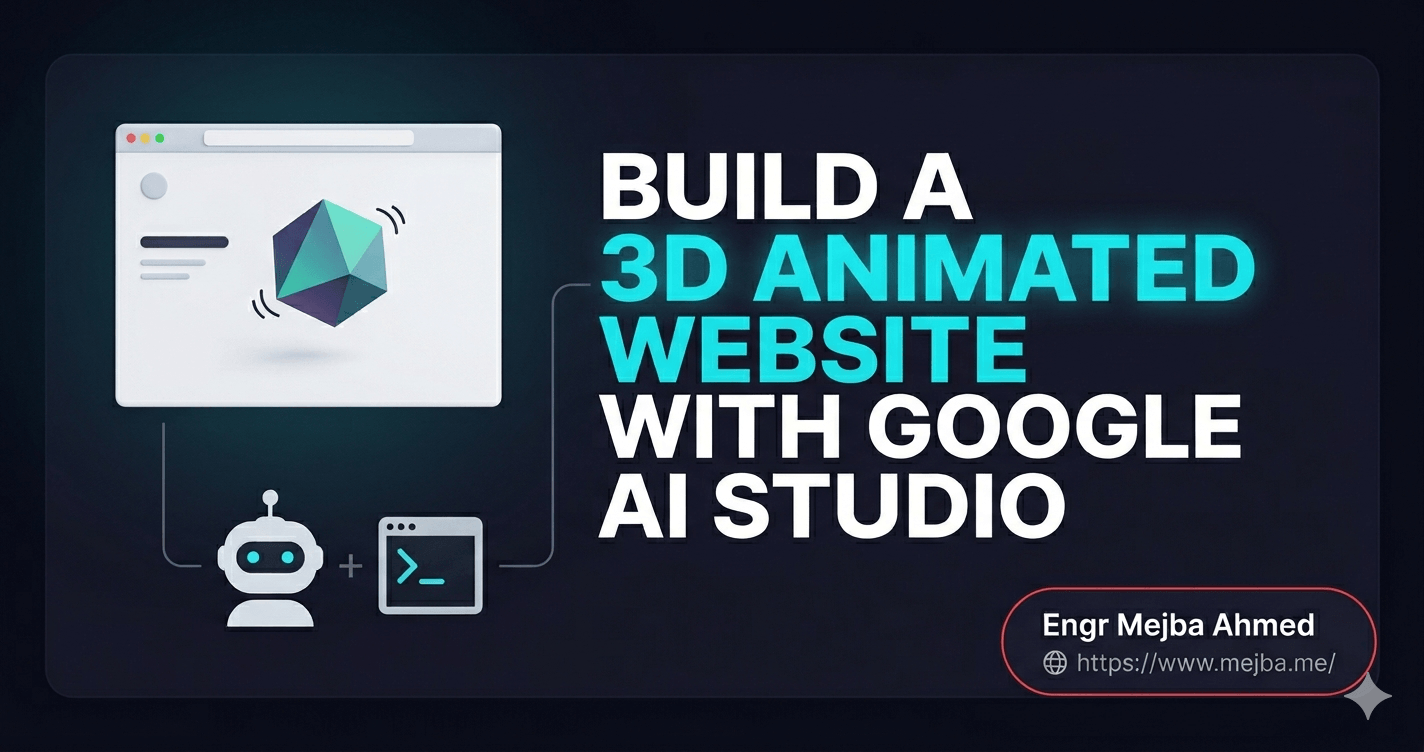
📝 Vibe Design & Vibe Coding

Build a 3D Animated Website With Google AI Studio

I built a 3D animated website with Google AI Studio using plain-English prompts, a Veo morph video, and mouse-controlled scrubbing. Full step-by-step inside.

23 min

Tempo de leitura

4,554

Palavras

Jun 01, 2026

Publicado

Engr Mejba Ahmed

Escrito por

Engr Mejba Ahmed

Compartilhar Artigo

Build a 3D Animated Website With Google AI Studio

Build a 3D Animated Website With Google AI Studio

The cursor moved left, and the character on screen turned its head to follow it. Moved right — the head tracked back the other way. No game engine. No Three.js. No 200-line shader file I copied from a tutorial and prayed over. Just an HTML page with a video element, a few lines of JavaScript wired to mouse position, and two AI-generated images stitched together into a morph.

That's the whole trick behind a 3D animated website Google AI Studio can build for you in an afternoon — and I want to walk you through every step, because the first time I saw this effect I assumed it was WebGL wizardry I'd never have the patience for. It isn't. It's a clever illusion: two poses of the same character, a video that smoothly transitions between them, and a cursor that scrubs that video frame by frame. Your brain fills in the 3D.

I rebuilt the entire thing from scratch to test whether it actually holds up — on desktop, on mobile, and on the kind of mid-range laptop most of your visitors are actually using. Some of it is genuinely magic. Some of it breaks in ways nobody mentions in the slick demo videos. I'm going to give you both.

By the end of this, you'll have a deployed, responsive, interactive site with a head-tracking hero animation. And you'll know exactly when this workflow is worth it — and when you should close the AI tools and write the code yourself.

Why this "3D" trick works (and why it's not really 3D)

Here's the thing nobody says out loud in these tutorials: there is no 3D model anywhere in this build.

What you're looking at is a flipbook. You generate one image of a character looking left, one of the same character looking right, then let an AI video model fill in the in-between frames so the head turns smoothly. That video has, say, 90 frames. When you map your mouse's horizontal position across the screen to a frame number — cursor on the far left shows frame 1, far right shows frame 90 — the character appears to follow your cursor in real time.

It feels three-dimensional because of interactivity, not geometry. The motion responds to you, instantly, and your brain reads "responsive motion" as "this object exists in space." It's the same psychological hook that makes a parallax scroll feel deep when it's really just two flat layers moving at different speeds.

Once that clicked for me, the whole build got a lot less intimidating. I'm not animating a 3D mesh. I'm playing a video backward and forward with a mouse. That's a problem I can solve.

I've leaned on this two-state-plus-morph pattern before in other forms — it's the same core idea behind the 3D scroll-effect websites I built in 15 minutes and the animated hero sections I assembled with AI image and video tools. The difference this time: the whole thing lives inside Google AI Studio, the input is your cursor instead of your scroll wheel, and you don't open a code editor unless you want to.

Before we touch a single tool, let's get the inspiration phase right — because that's where most of these builds quietly go wrong.

Step 1: Steal like an artist (the ideation phase)

The fastest way to make an AI-built site look AI-built is to start with a blank prompt and "make me a cool website." You'll get the same purple-gradient SaaS template everyone else gets.

So I start somewhere else. I open Pinterest and search for the character I want, not the website. For this build I wanted a stylized 3D figure — think a Pixar-ish bust or a clean Blender-rendered mascot — so I searched things like "3D character render bust" and "stylized character front view." Pinterest's related-pins rail does the heavy lifting after that; one good pin surfaces twenty more in the same visual language.

Then I cross-check two more sources:

  • Dribbble — for how working designers actually compose a hero around a character. Search "3D hero" or "interactive landing."
  • Land-book — a gallery of real, shipped landing pages. This is where you learn what a navbar and headline look like in production, not just in a portfolio shot.

I'm not copying anyone's layout. I'm building a reference board: one character I'll recreate, two or three navbar styles I like, one headline treatment. Screenshots of each go into a folder. Those screenshots become literal inputs later — Google AI Studio reads images, and a screenshot of a navbar you like will get you a closer result than three paragraphs describing it.

One honest caveat on the inspiration: don't lift a copyrighted character or a real artist's exact render and ship it commercially. Use references to define a style and composition, then generate your own asset. That's the difference between learning from work and stealing it.

Reference board done? Now we make the character — and we need it in two poses.

Step 2: Create two character poses with an AI image editor

The animation needs a start frame and an end frame: the character looking left, and the same character looking right. Identical everything else — same position, same lighting, same crop. Only the head turns.

I generated my base character first (front-facing, neutral), then used an AI image editor to produce the two poses. Any capable image model with an edit/instruct mode works here — Nano Banana Pro, an image-edit model in your tool of choice, or even Figma's own AI image features if you're already living in Figma. The prompt is the important part, and it needs to be boringly literal:

"Make the character look to the right side. Keep the exact same position, same lighting, same background, same crop. Only turn the head."

Then duplicate the base and run the mirror:

"Make the character look to the left side. Keep the exact same position, same lighting, same background, same crop. Only turn the head."

Pro tip: generate the two poses from the same base image in the same session, and explicitly tell the model to preserve everything except the head. If you generate them independently, the lighting or the shoulders will drift, and the morph video in the next step will warp weirdly as the AI tries to reconcile two slightly different bodies. Consistency between your two frames is the single biggest predictor of whether the final animation looks smooth or melty.

A quick word on Figma here, because the source video I was working from got fuzzy on this. Figma does have real AI features now — Figma Make can generate working layouts from a prompt, and there are AI image tools inside the editor. But Figma is not running ChatGPT, and its "expand" behavior is image generation, not magic 3D rigging. If you're comfortable in Figma, use it to lay out your reference board and tidy your two poses. If you're not, skip it entirely — you don't need Figma for this build. I tested both paths and the no-Figma path is faster for a single hero.

Two clean poses, transparent or solid background, same dimensions. Save them. Time to bring them to life.

Step 3: Generate the morph video with Google Flow (Veo 3.1)

This is the step the auto-generated transcript I started from called "Clai." There's no tool called Clai — what you actually want is Google Flow, the video creation interface powered by Veo 3.1, and specifically its Frames to Video feature.

Here's exactly what it does, verified against Google's current docs: you give Veo 3.1 a first frame and a last frame, and the model generates the entire transition between them — real, physically plausible motion, not a crossfade or a cheap morph filter. As of the January 13, 2026 update, Veo 3.1 also added 4K upscaling and audio to Frames to Video, though for a muted hero background you won't need the audio.

The workflow inside Flow:

  1. Open Google Flow and start a new project.
  2. Choose Frames to Video (also surfaced as "start and end frame" in some entry points).
  3. Upload your looking-left image as the first frame.
  4. Upload your looking-right image as the last frame.
  5. Add a short prompt to guide the motion: "Character smoothly turns head from left to right, slow steady motion, no camera movement, fixed background."
  6. Generate.

Veo fills in the head turn. Because your two frames were consistent (you did Step 2 properly, right?), the in-between frames hold together and you get a clean ~3–5 second clip of the character sweeping its gaze across.

A few real notes from doing this repeatedly:

  • Keep the motion small. "Turns head left to right" works. "Turns around dramatically" gives Veo too much room to invent geometry that wasn't in your frames, and the morph distorts.
  • Watch your credits. Veo generations cost credits even on the free allotments. Get your two frames right before you generate so you're not burning credits debugging melty faces.
  • Download the highest-quality clip you can, then we'll compress it for the web later. A pristine source compresses better than a pre-degraded one.

You now have the heart of the whole effect: one video that plays the head-turn forward and, crucially, can be played backward by scrubbing. That scrubbing is what we wire to the mouse. But first, the page it lives on.

Step 4: Build the hero and navbar in Google AI Studio

Open Google AI Studio and go to the Build tab (the vibe-coding interface). This is where the "no-code" claim actually earns itself — you describe the UI in plain English and Gemini writes the front-end code, with a live preview you can iterate on. Google's I/O 2026 update made this build mode genuinely capable for web apps, and the free tier lets you deploy your first couple of projects to Google Cloud without a credit card.

Here's the prompt I used. Notice how specific it is — vague prompts get vague output:

"Build a clean hero section with a top navbar. Navbar: logo on the left, four nav links on the right, no dropdowns. Hero: a large headline that says 'We'd love to hear from you' with a one-line subheading underneath, and a short question component asking the visitor which service they're interested in, with selectable options. Use a single sans-serif font throughout. Pure white background across the entire hero. Leave the right half of the hero completely empty — reserve that space for an animation I'll add later. Make it fully mobile responsive."

Then I uploaded my screenshots from the reference board — the navbar style and the headline treatment — so Gemini had visual targets, not just words.

The result was genuinely good: a clean, white, professional hero with a working navbar and a service-selector, the right half empty and waiting. Mobile responsiveness came essentially for free from that one "fully mobile responsive" line, which still slightly surprises me every time.

Pro tip: explicitly reserving the empty right side matters. If you don't, the AI fills the space with stock filler or a placeholder image, and then you're fighting its layout when you drop your video in. Tell it what the space is for. "Reserve the right half for an animation I'll add later" is a sentence that saves you ten minutes of cleanup.

If you'd rather have someone build this kind of interactive hero properly — wired up, performance-tuned, and handed over as clean code — that's the sort of front-end work I take on through my Fiverr profile. But honestly, for a single hero, the steps here will get you there yourself.

Clean shell, empty right side. Now we fill it with motion.

Step 5: Embed the morph video as the hero background

Upload your Veo morph clip into the AI Studio project, then prompt the build to place it:

"Place this video in the empty right side of the hero. Set it to 100% opacity, no overlay, no tint, no dark gradient on top. The video should be muted and should NOT autoplay. Keep the white hero background everywhere else."

Three settings here are non-negotiable, and they're easy to get wrong:

  • Muted. Browsers block autoplay with sound anyway, and a hero that talks at people is a hero people leave.
  • No autoplay. We don't want the video looping on its own — we want it controlled by the cursor. It should sit on frame one until the mouse moves.
  • No overlay. A lot of default hero patterns slap a dark gradient over background video for "text legibility." You don't need it — your text is on the white left half, the video is on the right. An overlay would just mute your animation. Kill it.

At this point you have a static-looking hero with a character sitting still on the right. Move your mouse and… nothing happens yet. That's the next step, and it's the one that makes the whole thing feel alive.

Step 6: Wire horizontal mouse movement to video scrubbing

This is the interaction that makes people stop scrolling. We map the cursor's horizontal position to the video's playback position — currentTime in plain terms — so moving the mouse left and right scrubs the head turn forward and backward.

Prompt AI Studio:

"Link horizontal mouse movement to the hero video's playback. When the cursor is at the far left of the screen, show the first frame of the video. At the far right, show the last frame. Map the cursor's X position smoothly across the video's full duration so moving the mouse scrubs the animation. Keep it muted and do not autoplay. Optimize for smooth, low-lag scrubbing."

Under the hood, what it generates is roughly this — and it's worth understanding even if you never touch the code:

const video = document.querySelector('.hero-video');
let targetTime = 0;
let rafId = null;

// Map cursor X (0 → window width) to video time (0 → duration)
window.addEventListener('mousemove', (e) => {
  const progress = e.clientX / window.innerWidth; // 0 to 1
  targetTime = progress * video.duration;
  if (!rafId) rafId = requestAnimationFrame(scrub);
});

// Ease toward the target instead of snapping — smoother, less janky
function scrub() {
  const current = video.currentTime;
  const next = current + (targetTime - current) * 0.15; // easing factor
  video.currentTime = next;
  if (Math.abs(targetTime - current) > 0.01) {
    rafId = requestAnimationFrame(scrub);
  } else {
    rafId = null;
  }
}

That easing line — nudging toward the target instead of jumping straight to it — is the difference between buttery and seizure-inducing. The naive version sets currentTime directly on every mousemove, which fires dozens of times a second and asks the browser to decode a new video frame each time. On a fast machine it's fine. On a normal one it stutters.

The honest performance truth nobody puts in the demo: scrubbing an HTML5 video by currentTime is genuinely hard on the browser. Video is compressed using keyframes, so jumping to an arbitrary time means the decoder has to seek to the nearest keyframe and decode forward. Do that 60 times a second and you get lag, especially with a heavy clip. The fixes, in order of effort:

  1. Encode for scrubbing. Re-export your Veo clip with a very short keyframe interval (a keyframe every 1–2 frames). The file gets bigger, but every frame becomes seekable. This single change fixes most desktop stutter.
  2. Keep the clip short and small. 3–5 seconds, sensible resolution. You don't need 4K for a hero that's 600px wide.
  3. Use requestAnimationFrame and easing (as above) so you're not thrashing the decoder on every mouse event.
  4. For the smoothest possible result, the pro move is to ditch the video entirely and render a sequence of image frames onto a <canvas> — but that's hand-coding territory, and we'll talk about when that's worth it at the end.

Get those right and desktop is genuinely delightful. Now we have to deal with the device half your visitors are on — where none of this works.

Step 7: Fix the mobile experience (because there's no cursor)

Phones don't have a cursor. There is no mousemove. So on mobile, the entire interaction we just built does exactly nothing — the character just sits there, frozen, and worse, background video on mobile tends to perform badly and eat battery.

I tested the desktop build on a phone and it was rough: the video stuttered, the layout tried to cram the animation next to the text, and the whole thing felt broken. So mobile needs a different plan, not the same plan shrunk down.

Here's the prompt that fixed it:

"On mobile devices: do not use mouse interaction. Instead, play the hero video once from start to finish and then pause on the last frame. Move the video so it sits BELOW the headline and text content, not beside it. Keep the white background and the text prominent and easy to read at the top. Make the whole layout stack vertically and stay fully responsive."

What this does:

  • Plays once, then pauses. The visitor still sees the head-turn animation play — they just don't control it. It's a passive flourish instead of an interactive one. Good enough, and far better than a dead frozen image.
  • Repositions the video below the content. On a narrow screen, side-by-side becomes a cramped mess. Stacking the text first (white background, readable) and the animation second keeps the message primary and the motion as a reward for scrolling.
  • Drops the scrub logic entirely on touch devices, which removes the performance penalty of constant seeking on hardware that hates it.

This is the part of these AI-build tutorials I wish more people were honest about: the desktop demo looks incredible, then you open it on your phone and it's a disaster. Plan the mobile fallback as a deliberate, different design, not an afterthought. The tools will do it — but only if you tell them to.

One small accessibility note while we're here: some visitors set "reduce motion" in their OS. A genuinely polished build respects prefers-reduced-motion and skips the auto-play on those devices. You can add that with one more prompt line: "If the user has prefers-reduced-motion enabled, show a static frame and don't animate." It costs nothing and it's the right thing to do.

Mobile handled. Let's add one last bit of polish to the headline.

Step 8: Add a typewriter effect to the headline

The typewriter effect — text that types itself out character by character — is the cheapest high-impact polish you can add. It pulls the eye to your headline and adds subtle motion to the static white left side that balances the moving character on the right.

Prompt:

"Animate the main headline with a typewriter effect — type the text out one character at a time when the page loads, then leave it static. Keep it subtle and quick, no blinking cursor after it finishes."

That's it. It worked on the first try in my build. The reason I add it last rather than first is sequencing: get your layout, your video, your interaction, and your mobile fallback solid before you sprinkle on flourishes. Polish on top of a broken foundation is just a nicer-looking broken thing.

A restraint note: one typewriter headline is elegant. A page where every line types itself out is exhausting. Animate the hero headline and stop.

You've now got a complete, interactive, responsive site living in AI Studio's preview. Time to get it onto the real internet.

Step 9: Deploy free with GitHub and Vercel

You've got two paths out of Google AI Studio, and I've used both.

Path A — the ZIP. AI Studio lets you download your project as a ZIP of the code. Grab it, and you can host those static files anywhere — drag them into any static host, or push them up manually. Fine for a one-off, but you lose easy redeploys.

Path B — GitHub to Vercel (what I recommend). This gives you a live URL and automatic redeploys every time you change something. The flow:

  1. Export the project from AI Studio to a GitHub repository (public or private — Vercel handles both on the free tier).
  2. Go to your Vercel dashboard, click Add New → Project, and authorize GitHub access.
  3. Find your repo in the list and click Import.
  4. Vercel auto-detects the setup, shows a configuration screen — for a static site you can usually accept the defaults — and you click Deploy.
  5. Vercel clones, builds, and deploys. You get a live URL, typically within 10–30 seconds.

From then on, every commit you push triggers an automatic redeploy in that same 10–30 second window. Change a headline, push, refresh — it's live. Vercel's free tier comfortably covers a hero site like this; you only pay if you blow past their hobby limits, which a single landing page won't.

That's the whole build. Inspiration to live URL, no framework, minimal code touched. Now the part that actually matters: when should you do this, and when should you not?

The honest verdict: where this shines and where it breaks

I'd be doing you a disservice if I ended on "and it's that easy!" — because it's easy until it isn't. Here's my real assessment after rebuilding this several times.

Where this workflow genuinely shines:

  • Speed to a wow-factor demo. From idea to a deployed, interactive hero in an afternoon is real. For a portfolio piece, a campaign landing page, or a client pitch, that's an unfair advantage.
  • The interaction is novel. Cursor-controlled head tracking is something most visitors haven't seen, and novelty earns attention. It photographs well, which matters for sharing.
  • No framework tax. You're not maintaining a build pipeline, npm dependencies, or a 3D library's breaking changes. It's a video and some JavaScript.

Where it breaks — and you need to know this before you commit:

  • Video scrubbing is a performance footgun. On low-end Android and older laptops, scrubbing a video by currentTime stutters no matter how cleverly you prompt. If your audience skews mobile or budget hardware, test on a real cheap phone before you ship.
  • The AI's code is a black box you don't fully control. When the scrub feels off and the prompt-fixes stop helping, you'll need to open the generated JavaScript and actually understand it. That easing function above? You may have to write it yourself.
  • It's a single trick. This pattern is perfect for one hero moment. It does not scale into a complex, multi-section product site. Don't try to make your entire app out of mouse-scrubbed videos.

When I'd close the AI tools and hand-code instead: the moment performance matters more than build speed. If this is a high-traffic page where a janky hero costs you conversions, I'd extract the video into a sequence of image frames and render them on a <canvas> — the technique used in genuinely smooth scroll-scrub sites. That's more work, but it's dramatically smoother because painting a pre-decoded bitmap is far cheaper than seeking a video. For a demo or a pitch, the video approach wins on speed. For production at scale, the canvas approach wins on quality. Know which one you're building.

What to actually expect (realistic results)

Let me set honest expectations instead of promising you'll go viral.

On desktop, with a properly encoded short clip and the easing logic in place, the scrubbing is smooth and genuinely impressive — the kind of thing that makes someone move their mouse back and forth a few times just because it's fun. That part delivers reliably.

On mobile, with the play-once-and-pause fallback, you get a clean, fast, readable page with a pleasant motion flourish. Not interactive, but not broken — which is the right trade.

On build time, expect an afternoon for your first one, including the inevitable round of "the morph looks melty, regenerate the frames." Your second build will take under an hour because you'll know to nail frame consistency up front.

On sharing — the original creator behind this technique mentioned a post of theirs hitting over 3 million views on X. I'd take any single viral number with a grain of salt; that's one person's marketing anecdote, not a guaranteed outcome. But the underlying advice is sound and I stand behind it: build things and show them. Record your screen with the cursor visible so people see the interaction, crop the dead space, and post the clip with a short caption. Visually striking, interactive work does get attention, and attention is how freelance clients find you. The view count is luck; the habit of shipping in public is not.

FAQ

Frequently Asked Questions

Everything you need to know about this topic

Yes — Google AI Studio's Build mode is free to use for prompting and previewing, and the free tier lets you deploy your first couple of projects to Google Cloud with no credit card required. You may hit usage limits on heavy use, and video generation in Google Flow (Veo 3.1) consumes separate credits, so budget those before you generate.

The morph is made with Google Flow using the Veo 3.1 model's "Frames to Video" feature. You upload a first frame (character looking left) and a last frame (looking right), and Veo generates the smooth transition between them. "Clai" is an auto-transcription error — the real tool is Google Flow / Veo 3.1.

Video scrubbing lags because seeking to an arbitrary currentTime forces the browser to decode from the nearest keyframe. Fix it by re-encoding the clip with a very short keyframe interval, keeping the video short and small, and easing toward the target time with requestAnimationFrame instead of setting currentTime on every mouse event. See Step 6 for the full breakdown.

Mobile has no cursor, so mouse scrubbing does nothing. Instead, set the video to play once and pause on the last frame, move it below the text content, and stack the layout vertically. This keeps the page fast and readable while still showing the animation as a passive flourish. Full prompt in Step 7.

Only if you already work in Figma. Figma's AI features (Figma Make and AI image tools) can help you lay out a reference board or tidy your two character poses, but Figma is not required for a single hero — and going Figma-free is faster. It doesn't run ChatGPT and doesn't rig 3D; it's an optional design step, not a core one.

You don't need a game engine — you need an afternoon

Go back to that opening moment: a head turning to follow a cursor, and your brain insisting it's 3D. It isn't. It's two images, one Veo morph, and a mouse mapped to playback. The "impossible" effect was a stack of small, learnable steps the whole time.

So here's your next 24 hours, if you want it: open Pinterest, find one character you'd enjoy recreating, and generate your two poses. That's the only hard part. Everything after — the morph, the hero, the scrub, the deploy — follows the prompts in this guide. By tomorrow night you could have a live URL with an interactive hero that most "real" developers would assume took you a week.

Build it. Then record it with your cursor visible and put it somewhere people can see it. The worst case is you learned a workflow in an afternoon. The best case is someone in your replies asks if you're taking clients.

Let's Work Together

Looking to build AI systems, automate workflows, or scale your tech infrastructure? I'd love to help.

Coffee cup

Gostou deste artigo?

Seu apoio me ajuda a criar mais conteúdo técnico aprofundado, ferramentas open-source e recursos gratuitos para a comunidade de desenvolvedores.

Tópicos Relacionados

Engr Mejba Ahmed

Sobre o Autor

Engr Mejba Ahmed

Engr. Mejba Ahmed builds AI-powered applications and secure cloud systems for businesses worldwide. With 10+ years shipping production software in Laravel, Python, and AWS, he's helped companies automate workflows, reduce infrastructure costs, and scale without security headaches. He writes about practical AI integration, cloud architecture, and developer productivity.

Discussion

Comments

0

No comments yet

Be the first to share your thoughts

Leave a Comment

Your email won't be published

9  +  4  =  ?

Continue Aprendendo

Artigos Relacionados

Ver Todos

Comments

Leave a Comment

Comments are moderated before appearing.

Learning Resources

Expand Your Knowledge

Accelerate your growth with structured courses, verified certificates, interactive flashcards, and production-ready AI agent skills.

Sample Certificate of Completion

Sample certificate — complete any course to earn yours

Engr Mejba Ahmed

Engr Mejba Ahmed

Claude Code Expert · Online

👋

Hey there!

Quick Actions

WhatsApp Instant reply

Chat on WhatsApp

+880 1723 741224 · Instant reply

Popular Questions

Engr Mejba Ahmed is connected
Engr Mejba Ahmed is typing...
Engr Mejba Ahmed avatar

✉ Want me to follow up? Drop your email

Engr Mejba Ahmed avatar

📞 Connect Directly

Choose how you'd like to reach me

WhatsApp

+880 1723 741224

Email

[email protected]

✓ Details sent! I'll get back to you shortly.

Powered by OpenAI

335+

Blog Posts

25

AI Courses

63

Projects

Services & Expertise

Pricing & Process

Learning & Resources

Connect & Support