

Claude Playground Plugin: Why I Can't Go Back
Three weeks ago, I was trapped in the most frustrating loop a developer can hit when working with AI. I needed a specific UI component — a card with rounded corners, a subtle shadow, 16px internal padding, and a precise shade of slate blue. So I typed out a prompt to Claude describing exactly that. Claude generated something close. Not quite right. I tweaked the description. Regenerated. Still off. Adjusted the wording again. Five rounds and twenty minutes later, I was staring at my screen thinking: I could have built this thing from scratch in the time I've spent describing it.
That night, scrolling through Anthropic's official plugin marketplace, I stumbled across something called the Claude Playground plug-in. Installed it on a whim. Asked Claude to generate a design playground for card components.
A single HTML file appeared in my project directory.
I opened it in Chrome, and everything about how I interact with Claude changed. No exaggeration — I genuinely haven't gone back to pure text prompting for visual work since. The thing that caught me off guard wasn't the pretty interface. It was the output. But I'll get to that in a minute, because the output panel is the piece most people completely overlook, and it's the entire reason this tool works.
What showed up in my browser wasn't another chatbot wrapper or a fancy settings panel. The Claude Playground plug-in teaches Claude a fundamentally new skill — generating self-contained, interactive HTML files that run locally in your browser with zero external dependencies. No CDNs. No npm packages. No build steps. Just one portable HTML file with all CSS and JavaScript inlined, ready to open anywhere.
Why Describing Visual Intent in Words Is a Losing Game
If you've spent any real time building with AI assistants, you've slammed into what I call the description wall. That moment where you can see exactly what you want — it's perfectly clear in your head — but translating that mental image into text feels like describing a painting to someone over the phone.
Simple requests work fine. "Make a blue button" is easy enough. But the moment you need specificity — "8px border radius on top corners only, 2px solid border in #E2E8F0, a box-shadow of 0 1px 3px rgba(0,0,0,0.1), and 24px padding with a 12px gap between child elements" — you're writing a specification document for every single component. And if one value is wrong? Back to the prompt. Rephrase. Regenerate. Check. Repeat.
That gap between visual intent and textual description is exactly where the Claude Playground plug-in operates.
The timing here matters too. Claude Code's skill-based plugin architecture matured significantly in early 2026. Plugins aren't just bolt-on tools anymore — they're genuine capabilities that Claude recognizes and deploys automatically based on your request context. When you ask Claude to help you explore a design, review a diff, or map out a system architecture, it can now generate a full interactive environment without you explicitly invoking any command.
I've been testing this plugin across real client projects through Ramlit and in my personal experiments. My prompt iteration cycles dropped from five-plus rounds to one or two. But the real value isn't just about speed — it's about a completely different feedback model between you and the AI.
Before I walk you through setting it up and using it, you need to understand the architecture. Because once you see how playgrounds work, you'll immediately start imagining use cases the built-in templates don't even cover.
The Mental Model That Makes the Playground Plugin Click
Think of the Playground plug-in as a conversation translator sitting between you and Claude. Instead of forcing you to describe what you want in words, the plugin generates a visual interface where you show Claude what you want through direct interactions — clicks, drags, slider adjustments, dropdown selections, color picks.
Then it translates those interactions back into the precise natural language that Claude understands best.
That's the core loop: Claude builds you a visual tool. You interact with it. The tool generates a prompt. You feed that prompt back to Claude. One round, precise results.
The architecture underneath is elegantly simple. Every playground is a single HTML file — no React, no build pipeline, no dependency management. Claude inlines all the CSS and JavaScript directly into the file. You can email it to a teammate, save it to a shared drive, or open it on a machine with zero developer tooling installed. I've sent playground files to clients who don't even have Node.js on their laptops, and the files run flawlessly in their browser.
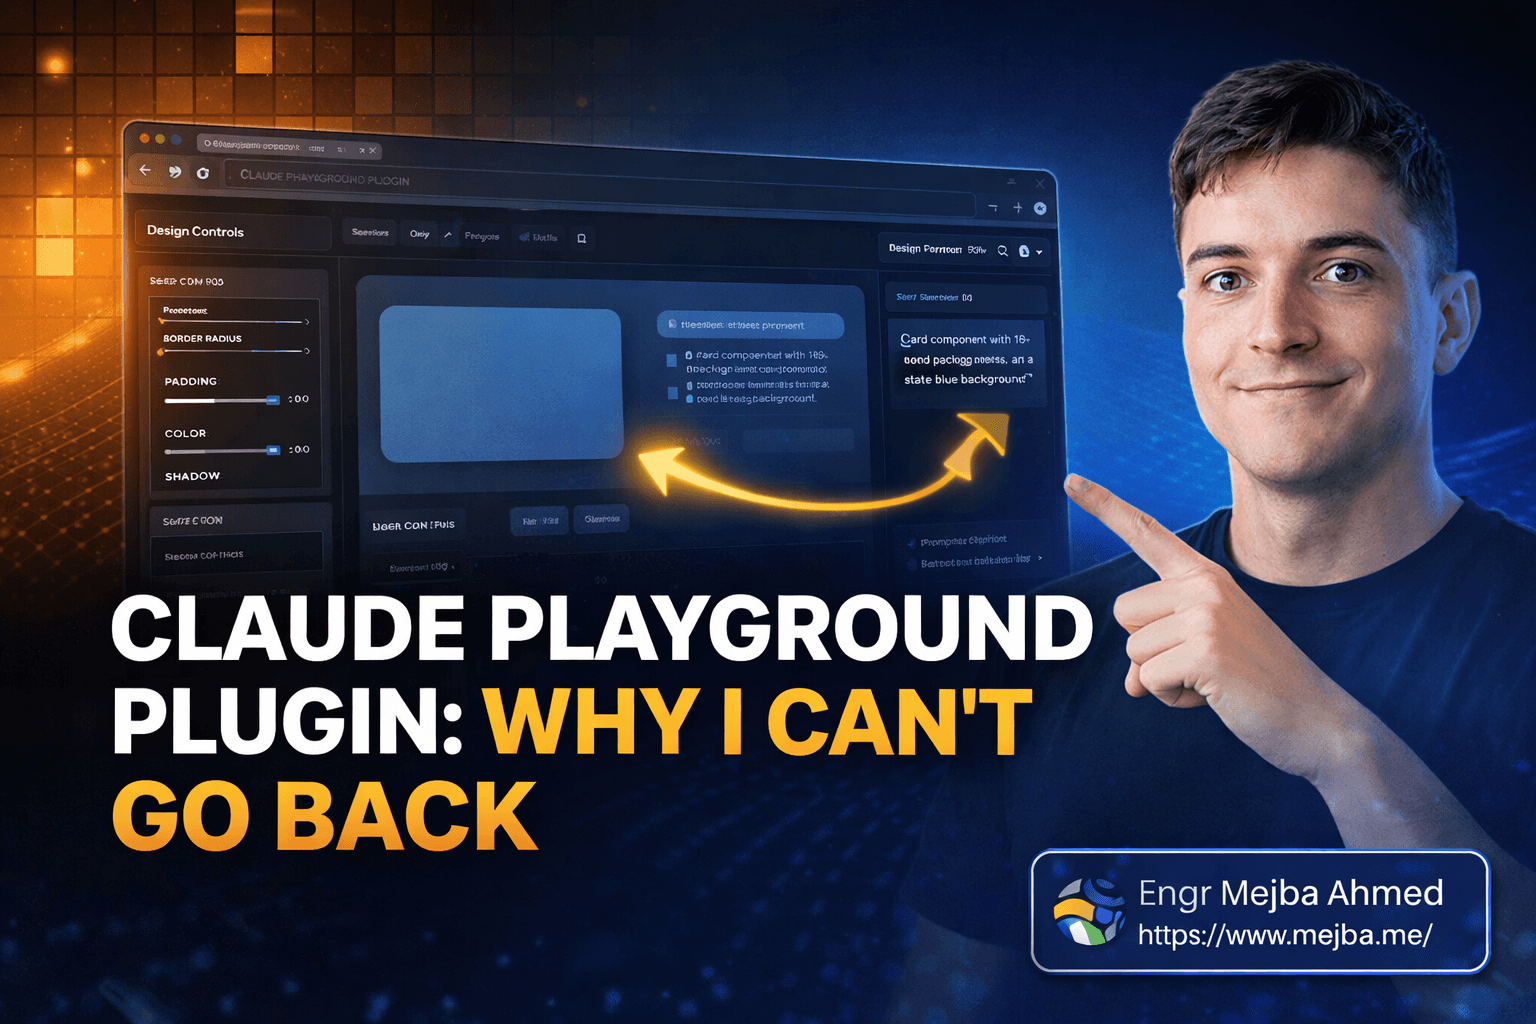
The Three-Panel Layout — Where the Real Power Lives
Every playground Claude generates follows the same three-panel structure. Once you internalize this pattern, you'll understand why the tool is so effective:
Panel 1: Interactive Controls. The left side of the playground. Sliders for spacing, dropdowns for font families, color pickers, toggle switches, numeric inputs — all customized based on the task at hand. A design playground gets visual styling controls. A data explorer gets query builders. A code map gets node selectors and annotation fields. Claude tailors these controls to match whatever you're working on.
Panel 2: Live Preview. The center panel. This updates in real-time as you adjust controls. Drag a spacing slider and watch the padding change. Pick a new color and the preview repaints instantly. No page refresh. No delay. This is the panel that kills the guessing game — you see exactly what your configuration produces before committing to anything.
Panel 3: Prompt Output. The right panel, and the genuinely clever piece of the whole system. This panel generates natural language text that captures only the changes you've made from default settings. If you adjusted border radius from 4px to 12px and changed the background from white to light gray, the prompt output mentions exactly those two things. Nothing more. You copy this text, paste it into a new Claude conversation, and get results that match your visual intent on the first try.
I've built dozens of components using this three-panel loop. When I was hand-writing descriptive prompts, I'd get maybe 65-70% accuracy on first generation. With the playground loop, I'm consistently hitting 95% or better. That gap is the difference between one round of work and five.
You're probably wondering whether six built-in templates can cover enough real use cases to justify installing the plugin. I was skeptical about the same thing. I was wrong.
Six Built-In Templates That Do Way More Than Expected
The plugin ships with six official templates. My initial reaction: "Only six?" After three weeks of daily use, my reaction: "These six cover about 80% of what I need, and Claude builds custom ones for the rest."
Design Playground — My most-used template by far. I configure UI components here: cards, buttons, layouts, typography scales, form elements. The controls cover spacing, color, shadows, border radius, and font properties. Each template ships with 3-5 named presets, and here's an honest admission — the presets alone handle roughly 60% of my design configuration needs without touching a single slider.
Data Explorer — This one genuinely surprised me. You build queries visually — SQL filters, regex patterns, API parameter chains — using dropdowns and visual constructors instead of typing raw syntax. The output is a query specification, not executable code. I used this last month to help a client define complex database migration filters. They could see what each filter did before applying it, and they didn't need to write a single line of SQL.
Concept Map — A physics-simulated canvas where you drag nodes, draw connections, and label relationships between concepts. The killer feature is the knowledge-level toggle on each node: mark concepts as "know well," "somewhat familiar," or "new to me." Claude then generates targeted learning prompts based on your actual knowledge state. When I was first wrapping my head around the Claude Code plugin ecosystem — skills, hooks, MCP servers, agent configurations — I mapped everything out on a Concept Map and marked my understanding level. The study prompts Claude generated were eerily well-targeted. I'll talk about the physics engine quirks later, because they're worth knowing about.
Document Critique — Line-by-line document review with approve, reject, and comment buttons on each section. I've been running my CLAUDE.md files and system prompts through this before committing changes. The structured feedback output is significantly more actionable than asking Claude to "review this document" in a chat. Each piece of feedback comes with a clear approve/reject/revise action.
Diff Review — Highlighted code diffs with inline comment support, generating structured code review prompts. I haven't used this one as heavily since I do most code reviews through GitHub's interface, but for offline review of large refactors or comparing different implementation approaches, it fills a real gap.
Code Map — SVG-based architecture diagrams where you click on components, draw dependency edges, and annotate relationships. I used this to document a microservices architecture for a client project, clicking through each service and adding notes about data flow and failure modes. The annotation output became the first draft of their technical documentation.
What surprised me most was the crossover potential between templates. The Concept Map isn't just for learning — I've used it for sprint planning and feature dependency mapping. The Design Playground isn't limited to UI components — I've configured email templates and data visualization themes with it. Once you internalize the three-panel model, creative applications start appearing everywhere.
But here's the thing — templates are just the starting point. The real unlock shows up when you ask Claude to build playgrounds that don't exist yet.
Setting Up the Plugin: From Zero to First Playground in 5 Minutes
Here's the exact setup process, including the gotchas I hit so you can skip them.
Step 1: Install from Anthropic's marketplace.
Open Claude Code and head to the plugin marketplace at claude.com/plugins/playground. Search for "Playground" — it's an official Anthropic plugin, so it appears at the top of results. Click install. The plugin registers as a skill, meaning Claude automatically recognizes when to generate a playground based on your request context. No slash commands to memorize.
Pro tip: After installation, verify it loaded correctly by asking Claude something like "Can you generate a design playground for a button component?" If Claude creates an HTML file, you're good. If it just describes what a playground would look like in text, the skill didn't register properly — restart Claude Code and try again. This bit me on my first install.
Step 2: Generate your first playground.
Don't overthink this part. Just ask Claude directly:
Generate a design playground for configuring a card component with shadow, border radius, and padding options.
Claude creates an HTML file in your project directory. Open it in any browser — Chrome, Safari, Firefox, whatever you prefer. The three-panel layout appears immediately.
Common mistake: The HTML file might open as raw source code in your editor instead of rendering in a browser. On macOS, right-click the file, select "Open With," and choose your browser. Sounds obvious, but I watched two developers on my team make this mistake in the same week.
Step 3: Play with controls and generate your prompt.
Start adjusting sliders, picking colors, toggling options. Watch the live preview update in real time. When the preview matches what you want, look at the prompt output panel on the right. Copy that text — it contains a natural language description of only the values you changed from defaults.
Step 4: Feed the prompt back to Claude.
Paste the prompt output into a Claude conversation. Ask Claude to build the component based on those specifications. Compare the result against what you'd get from a hand-written prompt. The accuracy difference is immediate and obvious.
Step 5: Go custom — build playgrounds Claude doesn't ship.
This is where things get genuinely exciting, and where most people don't push far enough.
You're not limited to six templates. Ask Claude to create completely custom playgrounds for any workflow you can imagine. I've done this repeatedly, and some of these custom playgrounds have become the most useful tools in my daily process.
Real example: I was working on a project where I needed to annotate screenshots — draw rectangles around specific UI elements, add text comments about what should change, and generate precise revision instructions for another developer. Normally, I'd open Figma, annotate the screenshot, then manually write up instructions in a document.
Instead, I asked Claude:
Create a custom playground where I can upload a screenshot, draw
rectangles on areas I want to annotate, add text comments to each
rectangle, and generate a detailed instruction prompt with the
coordinates and descriptions of each annotation.
Claude generated a complete image annotation playground. Single HTML file. I could drag rectangles over any screenshot, type comments for each region, and the prompt output panel generated location-aware instructions like: "In the header area (top-left: 20px, 120px to bottom-right: 400px, 180px), change the navigation font size from 14px to 16px and increase spacing between menu items by 4px."
That level of spatial precision in a text prompt would take me ten minutes to write manually. The playground got me there in thirty seconds.
Pro tip: When requesting custom playgrounds, be explicit about three things: what the controls panel should contain, what the live preview should display, and what format the prompt output should use. Claude is good at inferring intent, but explicit specifications lead to dramatically better first-generation results.
Step 6: Iterate and share.
Playgrounds are just HTML files. Open them in your code editor, make changes, save, refresh the browser. Or — my preferred approach — ask Claude to modify the existing playground:
Add a dark mode toggle and a font-family dropdown to the design
playground you just created.
Claude updates the HTML, and your enhanced playground is ready. I've iterated on some playgrounds five or six times until they perfectly matched my workflow, then saved them for reuse across projects.
Sharing is effortless since there are zero external dependencies. Drop the HTML file in Slack, email it, commit it to a shared repo. Anyone with a browser can use it. I've shared playgrounds with non-technical clients who configured component designs and sent me the prompt output directly — no developer tooling required on their end.
If you've followed along this far, you already have everything you need to start using the Claude Playground plugin productively. Most developers stop at the built-in templates and never explore custom playgrounds. That's leaving the most valuable part of the tool untouched. But before you go all-in, here's what I wish someone had told me during my first two weeks.
What I Wish Someone Had Told Me Before Week One
I've been genuinely enthusiastic about this tool throughout this post. Wouldn't be writing 4,000 words about it otherwise. But I'd be doing you a disservice if I glossed over the rough edges and pretended everything is perfect.
The learning curve isn't zero. My first three custom playground requests didn't match what I'd imagined. Claude generated controls that were either too granular (fourteen sliders when I needed three) or not granular enough (one dropdown where I needed separate controls for each property). By attempt four, I'd figured out the right level of specification detail. The pattern: describe the workflow you want, not just the interface. Tell Claude what decisions you're trying to make, not just what widgets to display.
Complex previews get sluggish. I tried building a playground that rendered a full responsive layout with media query breakpoints, animated transitions, and real-time Google Font loading. The live preview panel lagged noticeably on my M1 MacBook. For complex rendering tasks, simpler previews work better. Break ambitious configurations into multiple focused playgrounds rather than cramming everything into one massive interface. I learned this the hard way after watching a playground freeze my browser tab.
The Concept Map physics engine fights you sometimes. The force-directed simulation is a cool touch, but nodes bounce around when you're trying to position them precisely. My workaround: rough-position the nodes, hit the auto-layout button, then fine-tune from there. Don't try to place them perfectly on the first drag — the physics will fight you and win.
One misconception I keep seeing: people assume the Playground plug-in replaces Claude's code generation. It doesn't. Playgrounds generate prompts, not final implementation code. You still need Claude to interpret those prompts and produce the actual output. The plugin optimizes the input side of the equation — helping you communicate with precision. Think of it as upgrading your keyboard, not replacing your compiler.
Here's a prediction I feel confident making: within six months, we'll see plugin-to-plugin communication where one playground's output feeds directly into another plugin's input without manual copy-paste. The manual loop works great, but it's the obvious next optimization. Anthropic's skill system already supports capability chaining — the plumbing just needs a UI layer.
The honest trade-off worth knowing: playgrounds add a step to your workflow. For simple requests — "generate a blue button with rounded corners" — just typing the prompt is faster. Playgrounds pay off when the configuration space is large, when you need to explore options visually before committing, or when you're communicating spatial or visual intent that's painful to express in words. Match the tool to the complexity. Not every nail needs this particular hammer.
That said, let me show you the actual numbers — because the efficiency gains are measurable, not just theoretical.
The Actual Numbers After Two Weeks With the Playground Plugin
I tracked my workflow metrics for two weeks before and two weeks after adopting the plugin. Small sample, but the pattern held consistently across different project types.
Prompt iteration rounds per UI component:
- Before: 4-6 rounds average for anything beyond basic components
- After: 1-2 rounds
- Reduction: roughly 70% fewer back-and-forth cycles
Time spent on visual specification:
- Before: 12-18 minutes per complex component (writing prompts, regenerating, checking, tweaking)
- After: 4-6 minutes (generating playground, interacting with controls, pasting output)
- Savings: around 10 minutes per component, compounding across a full project
First-generation accuracy:
- Before: ~65-70% match between what I wanted and what Claude produced
- After: ~90-95% match on first generation
- That gap is the difference between shipping and iterating
Client communication impact: Sharing playgrounds with clients cut design revision cycles roughly in half. Instead of describing options over email and waiting for feedback, clients interacted with the playground directly and sent me their exact configuration. Two projects in January used this approach, and both finished design approval nearly a week ahead of our typical timeline.
Quick wins you'll notice immediately:
- Built-in presets handle common component configurations with zero customization needed. Standard cards, buttons, and layouts are a 60-second job.
- Running your README or configuration files through Document Critique gives you structured, actionable feedback without crafting a review prompt from scratch.
- Concept Maps for onboarding to a new codebase — marking what you understand and what's fuzzy — generate surprisingly precise follow-up questions for Claude.
Long-term gains that compound:
- Your library of saved custom playgrounds grows over time. Each one is reusable across projects. By the end of week two, I had six custom playgrounds I reach for regularly, and each one saves measurable time every day.
- Team members who receive shared playgrounds start using them independently, which reduces the back-channel "can you configure this for me" messages that eat into deep work time.
The honest benchmark for any tool: would I voluntarily go back to the old workflow? Not for a second. The playground feedback loop — generate, interact, copy, paste, done — has become muscle memory at this point.
Back to That Late-Night Frustration
That night three weeks ago — burning twenty minutes trying to describe a card component in words, five regeneration rounds deep, wondering if I should just hand-code the thing — feels like it happened to someone else. Not because the Playground plugin is some magical silver bullet. It's not. The HTML files are simple. The controls are straightforward. The concept isn't complicated.
But it solved such a specific, persistent pain point that my entire interaction model with Claude shifted around it.
The visual-in, text-out model is the insight worth taking away from this entire post. We've been forcing a text-in, text-out loop on interactions that are fundamentally visual. You know what you want when you see it — the Playground plugin lets you see it first, then tell Claude exactly what you saw.
So here's my challenge: install the plugin today. Generate one Design Playground. Configure a component you've been working on. Copy the prompt output and paste it into Claude. Compare that result against what you'd get from your usual hand-written prompt.
That single comparison will tell you whether this tool belongs in your daily workflow. My bet? You won't want to go back either.
And if you build a custom playground that solves a problem I haven't thought of yet — I genuinely want to hear about it. The most creative use case I've seen so far is an email template configurator that outputs brand-compliant HTML with a single copy-paste. What will yours be?
Let's Work Together
Looking to build AI systems, automate workflows, or scale your tech infrastructure? I'd love to help.
- Fiverr (custom builds & integrations): fiverr.com/s/EgxYmWD
- Portfolio: mejba.me
- Ramlit Limited (enterprise solutions): ramlit.com
- ColorPark (design & branding): colorpark.io
- xCyberSecurity (security services): xcybersecurity.io
